

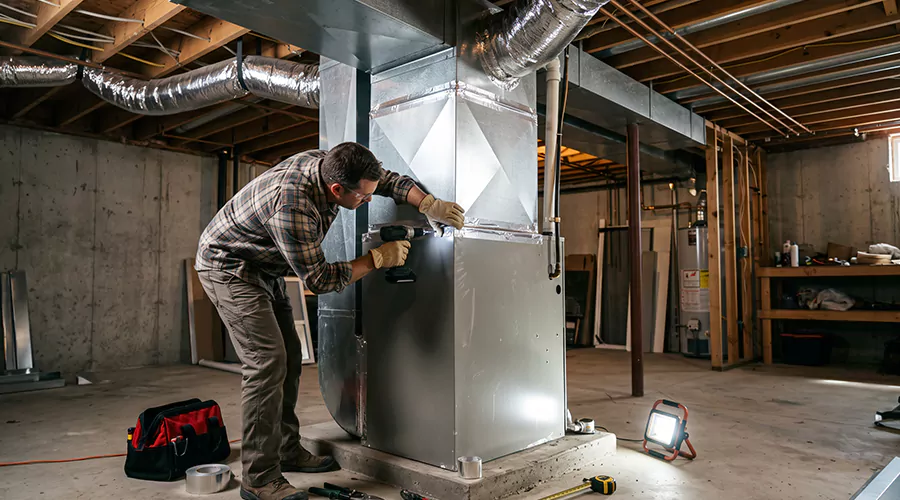
Attaching ductwork to an air handler involves connecting properly sized supply and return ducts to the equipment's designated openings, mechanically securing the fittings, sealing the joints, and supporting the ducts independently of the cabinet. Most installations use a supply plenum and a return plenum or filter cabinet rather than connecting several branch ducts directly to the equipment. Proper air duct installation helps ensure the completed system maintains appropriate airflow, equipment access, and condensate drainage.
An air handler is the indoor component that moves air through a central heating and cooling system. It contains a blower and may include an evaporator coil, electric heating elements, and control components. The ductwork connected to the air handler distributes conditioned air to the rooms and returns indoor air to the equipment.
Correct duct attachment is important because the air handler must operate within its intended airflow and static pressure limits. An undersized return opening can restrict the blower, while poorly sealed supply connections can release conditioned air into an attic or equipment closet. Leaks around the cabinet may also allow unfiltered air to enter sensitive internal components.
The installation method depends on the air handler model and orientation. Vertical upflow, downflow, and horizontal equipment configurations have different designated duct connection locations. The manufacturer's installation instructions should determine the permitted connection arrangements and cabinet modifications.
Where Does Ductwork Connect to an Air Handler?
Most residential air handlers have a designated return-air inlet and a supply-air discharge opening. Return air enters the equipment, passes through the intended filtration arrangement, and moves through the blower and heating or cooling components in the configuration specified by the manufacturer. The blower then delivers air into the supply network.
The supply duct connection normally attaches to an appropriate outlet flange, plenum, or coil cabinet connection. The return duct connects to the designated return opening, frequently through a filter box or return plenum. The exact relationship between the coil, blower, and duct connections varies by model.
| Air Handler Connection | Main Function | Installation Requirement |
|---|---|---|
| Supply discharge opening | Delivers conditioned air into supply ducts | Proper size, secure attachment, and sealing |
| Supply plenum | Distributes air into main trunks or branches | Correct dimensions and supported construction |
| Return inlet | Receives air from occupied rooms | Sufficient capacity and airtight connection |
| Return plenum | Collects air from return ducts | Sealed connections and correct airflow |
| Filter cabinet or filter rack | Holds the system's air filter | Accessible and resistant to bypass leakage |
| Evaporator coil cabinet | Houses the cooling coil where separately installed | Proper airflow and cabinet sealing |
| Equipment access panels | Allow maintenance and repair | Must remain removable and accessible |
Do not assume that any open cabinet panel is a suitable duct connection. Some equipment panels are for service access, electrical components, or condensate maintenance. The designated inlet and outlet must be identified from the equipment documentation.
What Is the Difference Between the Supply and Return Connections?
The supply connection carries air away from the equipment toward the rooms. Depending on the installation, it may attach to a large rectangular plenum or an approved transition. Supply duct dimensions should accommodate the air volume the blower delivers.
The return connection carries indoor air back to the equipment. It must have enough capacity to prevent excessive pressure loss. Inadequate return airflow can contribute to poor cooling and heating performance, even when the supply ducts are correctly sized.
Return connections also require careful air sealing. An opening on the return side can draw dust or unconditioned air from an attic, crawlspace, or equipment closet. The filtration arrangement should prevent unintended bypass around the air filter.
Both connections are important. Improving only the supply side cannot correct a major return-side restriction.
Can Ductwork Connect Directly to an Air Handler?
Some air handler configurations allow a duct or approved fitting to connect directly to a factory-designated opening. However, many installations use a plenum or transition to distribute air appropriately. The air handler manufacturer's instructions determine which arrangements are permitted.
A single flexible branch should not be attached to a large discharge opening without an engineered transition. An undersized connection can create excessive airflow resistance. It may also interfere with the air distribution pattern leaving the equipment.
If flexible ductwork is connected to an approved collar at the air handler or an attached plenum, the connection must follow the flexible duct manufacturer's fastening and sealing instructions. The duct should be supported independently to avoid placing unnecessary weight on the cabinet.
For major system changes, a qualified HVAC contractor should determine whether a plenum or different transition is required.
How Do You Size Ductwork for an Air Handler?
Duct sizes should be based on the equipment's intended airflow and the resistance through the complete supply and return system. The blower has a performance range that depends on the available static pressure. Ducts that are too restrictive can prevent the equipment from moving the required amount of air.
ACCA Manual D provides recognized residential duct-design methods. The contractor also needs the air handler's airflow tables and installation requirements. The supply plenum, main trunks, return duct, filter cabinet, and fittings should be evaluated together.
A rule of thumb such as a fixed amount of airflow per ton of cooling is not sufficient to design every system. Different equipment and operating modes may require different airflow targets. The actual manufacturer specifications should determine the acceptable range.
The return pathway must also be included in the calculation. A generously sized supply trunk does not compensate for a restrictive filter cabinet or undersized return duct.
What Materials Are Used to Connect Ducts to an Air Handler?
The connection may involve sheet metal plenums, transitions, insulated ducts, and manufacturer-approved connection flanges. All materials should be suitable for the equipment's operating conditions. The contractor should also select closure materials that meet applicable HVAC installation requirements.
| Material or Component | Purpose |
|---|---|
| Sheet metal supply plenum | Connects equipment discharge to supply network |
| Return plenum or return box | Connects return ductwork to equipment inlet |
| Approved transition fitting | Matches duct and equipment dimensions |
| Filter cabinet | Holds a correctly sized, accessible filter |
| Mechanical fasteners | Secure approved duct fittings |
| UL 181-compatible HVAC mastic | Seals suitable duct and cabinet joints |
| Listed HVAC closure tape | Seals approved seams and connections |
| Manufacturer-approved gaskets | Seal applicable cabinet and access joints |
| Duct insulation | Limits unwanted heat transfer |
| Suitable hangers and supports | Carry duct weight independently |
| Optional approved flexible connector | Reduces vibration transfer where appropriate |
The U.S. Department of Energy recommends sealing the seams between an air handler cabinet and its supply and return plenums. Suitable mastic, gasket materials, and UL 181 closure products may be used according to the equipment and duct construction.
Sealants should not obstruct access panels or contact components where the manufacturer prohibits them.
How to Attach Ductwork to an Air Handler Step by Step?
The following procedure describes the general professional approach for attaching supply and return ductwork to a residential air handler. The actual installation depends on the model, coil arrangement, and equipment orientation. Work involving internal electrical components, refrigerant lines, or factory cabinet modifications should be performed by qualified technicians.
Step 1. Read the Air Handler Installation Manual
Identify the exact equipment model and its installation orientation. The manual should show the permitted supply and return openings, connection dimensions, and service clearances. It may also specify required transitions or filter arrangements.
Do not infer the correct connection from photographs of another air handler. Equipment from different manufacturers can have substantially different cabinet designs. The manufacturer's instructions provide the starting point for the duct installation.
Step 2. Confirm Equipment Airflow Requirements
Determine the required airflow for the connected heating and cooling system. Review blower performance tables and the intended operating modes. The duct system must remain within the equipment's specified pressure and airflow conditions.
A contractor can use ACCA Manual D to develop the duct layout. The design should include the filter cabinet and return network because those components also contribute resistance. Correct sizing should be established before plenums are fabricated.
Step 3. Identify Supply and Return Openings
Locate the designated supply discharge and return inlet on the air handler. Their positions depend on whether the unit is installed vertically or horizontally. Confirm that the proposed duct layout corresponds to the approved orientation.
A horizontal air handler may be installed in an attic, while a vertical unit may be placed in a utility closet. The duct connections and drainage arrangements can differ. Using the wrong opening or obstructing a service panel can create serious installation problems.
Step 4. Check the Installation Location
Inspect the supporting platform, equipment clearances, and nearby duct routes. The air handler must remain accessible for filter replacement, coil inspection, electrical service, and other maintenance. New ducts should not block these access requirements.
If the equipment is installed in an attic, the installation should also address approved service access and condensate overflow protection. The support arrangement must accommodate the equipment and the attached ductwork without excessive movement.
Step 5. Verify Electrical and Mechanical Safety
Shut down the equipment and follow the manufacturer's electrical isolation procedures. An air handler can contain high-voltage wiring and components that remain hazardous when the thermostat is off. Qualified personnel should confirm safe working conditions before opening applicable equipment sections.
Protect refrigerant tubing and condensate connections during duct attachment. Do not drill arbitrary holes into the cabinet because internal wiring, coils, drain pans, or other components may be located behind the metal. Use factory-designated connection points and approved methods.
Step 6. Prepare the Supply Connection
Inspect the air handler's supply outlet and any designated attachment flange. Determine whether the connection requires a plenum, transition, or manufacturer-approved connector. The proposed fitting should match the equipment dimensions without obstructing the discharge opening.
An abrupt reduction immediately after the outlet can create excessive airflow resistance. The contractor should use a suitable transition that supports the design airflow. The equipment manual may identify additional requirements near the outlet.
Step 7. Fabricate or Select the Supply Plenum
A supply plenum is commonly installed at the discharge opening to distribute air into one or more trunks or branches. Its dimensions and shape should support the designed airflow. It should also provide suitable locations for branch connections and any necessary dampers.
Rigid sheet metal is commonly used for supply plenums. Other approved products may be permitted, subject to equipment temperature limits and local requirements. The plenum should not be an improvised box that restricts airflow or obstructs coil access.
Step 8. Attach the Supply Plenum or Transition
Position the fitting against the approved equipment flange or cabinet connection. Use the manufacturer's permitted mechanical attachment methods. The joint should remain structurally secure without deforming the cabinet.
Where an approved flexible vibration-isolating connector is used, install it according to its listing and the equipment manufacturer's requirements. Such connectors can reduce vibration transfer but should not substitute for proper duct support. The ductwork should not hang solely from the equipment cabinet.
Step 9. Seal the Supply Connection
Seal the fixed joint between the air handler and supply plenum using compatible materials. The Department of Energy recommends appropriate mastic, gaskets, or listed closure products at cabinet-to-plenum seams. The goal is to prevent conditioned air from escaping into the surrounding space.
Avoid covering removable access panels or blocking factory openings. The correct seal should preserve serviceability and comply with the equipment instructions. Wide or damaged joints may require mechanical correction before sealing.
Step 10. Prepare the Return Inlet
Identify the approved return opening and determine how the return ducts will connect. The return pathway should provide adequate capacity without forcing the blower to draw air through an undersized opening. A properly designed return plenum or filter box may be required.
The Department of Energy recommends dedicated, sealed return ducts rather than relying on unintended building cavities. An air handler should receive air from appropriate indoor return locations, not through leakage from the surrounding attic or garage.
Step 11. Install the Filter Cabinet
Install the filter cabinet or approved filter arrangement according to the equipment design. The filter must be accessible for replacement and correctly sized to avoid excessive pressure drop. Its orientation should match the intended airflow direction.
Gaps around the filter can allow dust to bypass the media and enter the blower or cooling coil. The filter cabinet should therefore be properly sealed. The Department of Energy also recommends airtight gaskets for appropriate filter access panels.
Do not permanently seal a panel that must open for filter replacement. Service access is part of the installation requirements.
Step 12. Attach the Return Plenum
Connect the return plenum or duct transition to the designated equipment inlet or filter cabinet. Use suitable mechanical attachment methods and support the ductwork independently. The fitting should align correctly without narrowing the required airflow passage.
A return plenum that is too small can create noise and excessive pressure loss. It should be sized through the system design rather than fabricated only to match the smallest available space.
Step 13. Seal the Return Connection
Apply compatible sealing materials to the fixed return plenum joints. An air leak at this location can draw unwanted air from the equipment closet, attic, or crawlspace. The air handler should receive air through its intended return and filtration pathway.
Inspect any adjacent filter rack or cabinet seams. Sealing only the visible main return duct may leave significant bypass openings closer to the equipment. The complete return connection should be evaluated.
Step 14. Connect the Supply and Return Trunks
Attach the main ducts to their approved plenum connections. Rigid metal ducts require appropriate fittings, mechanical fasteners, and joint sealing. Flexible ducts need compatible beaded collars, approved drawbands, and suitable inner-liner sealing.
Branches should not be connected randomly to the plenum without considering the airflow design. Takeoff locations and fitting sizes affect how air is distributed. The system should provide suitable pathways for all intended rooms.
Step 15. Support the Ductwork
Install appropriate hangers or supports so duct weight does not rest excessively on the air handler cabinet. Large metal trunks may require substantial structural support. Flexible ducts need wide straps or saddles that prevent sagging and compression.
The Department of Energy recommends typical horizontal flexible duct supports no more than four feet apart, with a minimum support width of 1.5 inches. Additional support may be needed near connections and bends. The equipment should remain stable after the duct system is attached.
Step 16. Insulate the Connections
Install insulation on ducts and plenums where required by the local energy code and installation conditions. Ductwork in unconditioned attics and crawlspaces may experience significant heat transfer without suitable insulation. Metal fittings should also be evaluated for condensation risk.
Complete air sealing before covering joints with insulation. The insulation should remain continuous without large gaps or excessive compression. Suitable vapor protection may be necessary around cold supply surfaces.
Step 17. Protect Condensate Drainage and Service Access
Confirm that the attached ducts do not interfere with condensate lines, drain pans, or required service openings. Cooling coils remove moisture from indoor air, and the condensate must discharge through the intended drainage system. A blocked or incorrectly arranged drain can create water damage unrelated to the ductwork.
Air handler models can require specific drain-trap arrangements and overflow safety provisions. These should follow the manufacturer and local code. Duct attachment must not alter the approved drainage configuration.
Step 18. Inspect All Cabinet and Plenum Joints
Check the completed installation for open seams, unsupported fittings, damaged insulation, and obstructed equipment access. Confirm that supply and return connections are attached to the correct openings. The filter arrangement should also be checked for proper seating.
The Department of Energy identifies cabinet-to-plenum connections as important air-sealing locations. These joints can leak even when the ducts farther downstream are in good condition. Correct visible defects before normal operation begins.
Step 19. Perform Duct Leakage Testing
A qualified contractor should evaluate the completed duct system for leakage as required or appropriate. A duct pressurization test can identify openings in the ducts and applicable cabinet connections. The results should be compared with the project's code or performance requirements.
Leakage testing is particularly useful when the equipment is located outside conditioned space. Supply leaks can release conditioned air into an attic, while return leaks can draw undesirable air into the system.
Step 20. Verify Airflow and Static Pressure
Operate the system after all panels and connections are properly restored. Measure static pressure and evaluate airflow using procedures appropriate for the equipment. Compare the results with the manufacturer's published blower performance information.
If measured airflow is outside the required operating range, the contractor should investigate the filter, plenums, transitions, and connected ducts. A system should not be accepted simply because the blower turns on. The completed connection needs to support the intended heating and cooling performance.
How to Connect Supply Ductwork to an Air Handler?
A supply plenum or approved transition commonly connects directly to the equipment's designated discharge. The fitting should match the opening without creating an unnecessary restriction. The attached supply trunk then distributes air to branches serving different rooms.
The connection must remain mechanically secure and airtight. The Department of Energy recommends sealing the fixed joint between the air handler or coil cabinet and the supply plenum. Proper supports should carry the weight of the downstream ductwork.
Supply fitting dimensions should come from the equipment and duct design. Connecting a very small trunk directly to a large discharge opening can increase resistance and affect blower performance.
How to Connect Return Ductwork to an Air Handler?
The return network normally connects to the designated inlet through an appropriate return plenum or filter cabinet. The connection must have enough airflow capacity and should prevent unintended air entry from surrounding spaces.
The filter should be correctly positioned and accessible. A poorly sealed filter rack can allow unfiltered air to bypass the media. The contractor should examine both the return plenum joints and the equipment cabinet seams.
Return airflow affects the entire HVAC system. A restrictive return can increase static pressure and reduce delivered air, even when the supply side is correctly installed.
Can You Attach Flexible Ductwork Directly to an Air Handler?
Some air handlers and approved distribution assemblies allow flexible ducts to connect through suitable collars. However, the connection should be part of an appropriately designed distribution system. Attaching multiple flexible ducts directly to a cabinet without suitable takeoffs or airflow planning is not a reliable substitute for a proper plenum.
Flexible inner liners require approved mechanical fastening and sealing. The surrounding insulation and exterior jacket must be restored. The ducts should also be supported so the cabinet connection does not carry unnecessary weight.
The manufacturer should confirm whether the proposed direct connection is permitted. When the equipment requires a plenum or specific transition, that component should be installed.
Should an Air Handler Have a Supply and Return Plenum?
Many air handler installations use both supply and return plenums, although the exact configuration varies. A supply plenum provides space for appropriate transitions and branch connections. A return plenum collects incoming air and directs it toward the equipment through the intended filter arrangement.
The size and shape of the plenums should match the HVAC design. A plenum that is too restrictive can create airflow problems even when the attached ducts are large enough. Proper dimensions also help provide suitable fitting locations.
Not every installation uses two separate conventional metal boxes. Some equipment connects to approved filter cabinets or specially designed distribution assemblies. The manufacturer's installation instructions determine the acceptable configuration.
Should You Use a Flexible Connector Between the Air Handler and Duct?
A flexible vibration-isolating connector may be appropriate in certain systems to limit transmission of equipment vibration into rigid ductwork. These connectors are different from ordinary insulated flexible branch ducts. Their purpose and installation method depend on the product and equipment design.
A vibration connector should not be used to compensate for unsupported or misaligned ductwork. The connected plenum or trunk still requires proper support. The connector must also be suitable for the equipment's operating conditions.
Some installations do not require a separate flexible vibration connector. The contractor should select it according to the manufacturer and project specifications rather than install one automatically.
What Mistakes Should You Avoid When Connecting Ducts to an Air Handler?
Air handler connections affect the entire duct network. Incorrect sizing, poor fastening, and bypass leakage can interfere with normal equipment operation. The installation should also preserve service access and protect internal components.
Avoid these mistakes:
- Connecting ducts to the wrong equipment opening.
- Ignoring the air handler manufacturer's installation instructions.
- Using an undersized return plenum.
- Installing abrupt restrictive transitions without a suitable design.
- Allowing heavy ductwork to hang from the equipment cabinet.
- Leaving cabinet-to-plenum seams unsealed.
- Creating bypass openings around the air filter.
- Sealing a panel that must remain removable.
- Drilling into cabinet areas containing wiring, coils, or drains.
- Obstructing condensate drainage components.
- Installing flexible ducts without suitable collars and mechanical fasteners.
- Using ordinary cloth-backed tape for permanent duct sealing.
- Leaving insulation incomplete in unconditioned spaces.
- Drawing return air from prohibited or unintended locations.
- Ignoring combustion safety concerns where relevant.
- Skipping airflow and static pressure verification.
A completed installation should provide appropriate airflow without making the air handler difficult or unsafe to service. Equipment performance and ductwork quality must be considered together.
When Should You Hire an HVAC Professional?
Attaching a new plenum or major duct system to an air handler should be handled by a qualified HVAC contractor. The work can involve opening equipment cabinets, changing airflow pathways, and working close to electrical and refrigeration components. Incorrect installation may damage the equipment or create unsafe conditions.
Professional service is especially important when replacing the air handler or redesigning the supply and return systems. A contractor can select suitable transitions and measure performance after installation. This helps identify airflow restrictions before the equipment is returned to regular use.
Conclusion
Attaching ductwork to an air handler requires correctly sized supply and return connections, appropriate plenums or transitions, and secure, airtight joints. The ductwork must be supported without placing excessive weight on the cabinet. Filter access, internal equipment components, and condensate drainage should remain protected. The finished system should be evaluated for leakage and acceptable static pressure and airflow. Follow the manufacturer's instructions and use qualified HVAC personnel for substantial equipment connections.